Fit my 4x4:

Reset
Fit my 4x4:

check out our blog

5 Reasons Why a 12v Fridge is One of the Best Investments You’ll Ever Make!
Whist the initial buy price might put off many people, especially when comparing the prices of them against a simple esky an Ironman 4×4 12v fridge really is one of the best investments you’ll ever make!

1. It’ll keep things cold longer

Ice has a usable. Even using some smart methods like blocks and a good quality esky your ice will be lucky to last a week. A fridge on the other hand. So long as you keep your battery topped up will keep going and going and going. Keeping the battery charged up generally required doing a long drive every few days or running a sufficiently sized solar panel.

2. It carries more than an esky

Once you account for all the ice that you need to load into an esky to keep the contents cool you’ll lose a lot of real estate that in a 12v fridge can be used with more food and drinks!

3. No soggy Contents & no plunging your hand into ice!

An eskies ice will melt over time. And often you’ll find your food floating in amongst the ice by the end. Should the food not be properly sealed it can often soak up water or worse, make the water fetid. I’m looking at you open, floating packets of bacon! A fridge on the other hand doesn’t use melting contents to keep them cool, instead using a compressor which will keep ticking along keeping everything cold and dry!

4. Temperature control

An esky doesn’t have any form of temperature control, Ironman 4×4 fridges on the other hand have a temperature control built in. The compressor works only enough to maintain that set temperature, ensuring consistency across a day when it is hot during the day and cool at night. This ensures the contents of your fridge are maintained at an ideal temperature and maximises their fridge life and ensures your contents are safe to consume!

5. No preparation required.

Stopping off at a servo to grab ice and working out how many bags are needed is no longer a problem. Not only do you get to save on the small ongoing cost of buying ice, but you save the inconvenience of having to go buy it. Just switch on your fridge if it isn’t already running, load it up with food and away you go! (best power efficiency gained from pre-chilled fridge via 240v and loading fridge with pre-chilled food & drink).
Getting the right shot – Vehicle photography tips
Taking a quality photograph of a vehicle is a simple process made more effective following these few basic steps. From an iPhone to a top of the line DSLR, irrespective of what camera you have, the following tips will help you take a better photo of your 4×4.

Lighting

Good lighting is essential. The best lighting conditions are within 1-2 hours of sunset or early in the morning, position the vehicle so you are shooting with the sun behind your back or slightly to one side. If the sun is in this location, you will not need a flash and shadows will be minimal. Be careful that your own shadow is not visible in the photo. Avoid the harsh midday sun. A cloudy day is ideal for a soft, even and diffused light, reducing glare. Check the reflections. Nearby objects can project ugly and distracting reflections on windows, bodywork and chrome work. A clear open location with minimal distractions is preferred. Check the shadows. Nearby buildings or trees can cast unsightly darkness on the car.  

Location

Choose a location that is not cluttered. You don`t want to see the busy street, signpost or dumpster in the background of your photo. A clean blank factory wall or vacant land is a good place to start. Ideally a natural scene is best.  

Composition

In most cases a ¾ front or rear image is the most desirable. A direct front, rear or side shot square to the vehicle is also good to have in the collection. Determine the best location and positioning, before parking the vehicle. Avoid temptation to stand too close to the vehicle, this gives a distorted and unappealing visual if not done correctly. Walk away from the vehicle at least 10 metres or more and use your camera zoom to ¾ fill the frame. Do not take the photo at normal eye level. Crouch down and take the photo at about waist height. For front ¾ photos, turn the front wheels away from the camera, Never point the wheels towards the camera unless taking close up photos of the suspension. For the ¾ rear photos, turn the front wheels so you can see the wheel face, not the tyre tread. Straight wheels are also acceptable according to the mood but some turn angle will give the vehicle a more aggressive stance. Avoid cropping parts of the car, its unlikely that photo will be good for anything if its missing part of the car. Finally – Rule of thirds. Imagine the image split into thirds, position your subject on one of the third lines, as opposed to the centre of the frame.

Equipment

Quality equipment is preferred but not essential, if you value taking photos and wish to advance your results, a preferable choice of camera to invest in would be a DSLR or a smaller fixed lens DSLR.
Sleeping Arrangements – Swags, Tents & Rooftop tents
There are so many option for sleeping arrangements these day, all which have their own merits. It can be hard to make the choice of which one is right for you – and often it’ll depend on the trip you’re doing.

Swags

The venerable swag has be a dominant part of Aussie culture since the days of swagmen. A waterproof roll of bedding that’s quick and simple to setup and pack up. Over the last few years there has been some serious innovation put into the traditional swag design. Changes to make space inside swags larger, and the introduction of poles to hold the canvas away from occupants and thicker mattresses have made the modern swag a luxurious experience. The Ironman 4×4 swag range even includes a shoe bag to ensure you shoes are stored in a dry place! Swags are an ideal form of accommodation for cool climates and people who are moving camp regularly. Being easy to just roll up and throw on the roof or the back of the vehicle, swags are a convenient bit of accommodation. Swags are great in cooler climates do to the smaller air space surrounding the occupants. With less air to warm up, the swag is one of the warmest accommodations available! The major down side to swags is space, both inside and when storing for transport. Having all your bedding inside means they pack down to a fairly large size. Fortunately being waterproof they can be stored up on the roof of your vehicle, but it is something to consider – especially if you’ve got multiple swags per vehicle. Furthermore, space inside swags can be restrictive, even modern swags generally have less space than a small tent. You generally can’t sit up inside them, and entering and exiting when raining can lead to you bedding getting wet (it’s highly recommended to setup a swag under something such as an awning to avoid this).

Tents

Tents are probably the first accommodation everyone would have been introduced to when camping – and for great reasons! There is such a diverse range of tents to suit all sorts of needs, from small and light weight hiking tents, through to large 8-10 people canvas mansions. Tents are great, especially for families as they afford a lot more room. Bigger tent provide you with a large amount of sheltered space – meaning that even if it’s raining, you won’t feel cramped and can often do things like cook if they have in awning/undercover area. Tents provide a great advantage for people who use a “base camp” and drive off every day, you can leave everything setup and return without needing to worry about packing down and setting up again. Tents provide a great advantage for larger groups as well as they can generally be packed down smaller than other alternatives, and even large ones can often have parts stored separately to maximize storage flexibility. On the other hand, if you’re moving daily ground tents can be a bit of work – especially the larger more complex designs. Often there is a bit of work in setting them up, and packing them up wet can mean having a wet tent at the next camp site. Additionally the need to add bedding into the tent adds time to setup as well.

Roof Top Tents

Roof top tents have a lot of similarities to both tents and swags. Similar to a swag, you can store a small amount of bedding inside – saving you needing to find somewhere to store it in the vehicle. But like a tent, you have a lot more room internally to “live”. A roof top tent has some unique benefits. They have plenty of sleeping space, you’ll have a solid, insulated base and mattress – meaning that even on the most uneven of surfaces, so long as your vehicle is relatively level you’ll have a comfortable bed without the requisite cleaning of ground and foliage. You’ll also find that setup and pickup is quicker than a ground tent, but slower than a swag – providing a good compromise considering the additional space. And finally there is the under cover space beneath the roof top tent, which can be useful for keeping out of bad weather without needing to setup an awning when you are for example cooking (personally I love having one open up over the rear door of the vehicle so that you can access the drawer system whilst staying dry. The down side to roof top tent is that they need to be climbed up into (can be a deterrent for some – and a positive for others) and when you are operating from a base camp and driving daily, you need to setup and pack up the tent every day to drive the vehicle. Finally the other disadvantage is weight. Roof top tents are inherently heavier than alternative options and need to be stored on a roof (raising the center of gravity for a vehicle). Many of these disadvantages can be offset if they are mounted on a trailer – giving you the flexibility of leaving behind a setup base camp.

What should you choose?

There are alternatives beyond the above like hammocks and camper trailers, but for the most part they are the most common options chosen – and camper trailers have so many variances that it’s difficult to add them as a single alternative option. But the important thing to note is that every option has it’s own advantages and disadvantages and everyone will have their own style of camping that will suit a particular sleeping arrangement. It may even be that the idea setup changes on trip to trip. A weekend away with the boys might mean throwing out a swag, but touring across the Simpson Desert with your partner might be better suited to the comfort and space of a roof top tent. If you have any questions about the best setup for yourself. Contact Ironman 4×4 at info@ironman4x4.com and get some expert advice.
4×4 Australia – Foam Cell Pro Chat
On our recent High Country trip with 4×4 Australia, we had a quick chat with their Editor, Matt about our class leading Foam Cell Pros.
Staying warm when camping in winter
With the Queens Birthday weekend coming at the end of the week and winter officially hitting Australia, it’s time to talk about living with the cold! Winter camping doesn’t need to be an unpleasant experience, but preparation is key to ensuring you have a great time!

Clothing

It should go without much to be said, but warm clothing is important when camping during winter. But warmth isn’t the only thing you should be considering. Waterproof clothing is also vital! The best warm clothing won’t keep you warm if you’re saturated from rain. A quality waterproof jacket such as our Cooper Jacket is designed to be tough, warm and waterproof! Layer your clothes. Layering clothes allow you to add and shed layers easily to account for variation in temperatures and activity. A set of thermals can help significantly in regulating your temperature, with t-shirts, jumpers and jackets over the top. Keep your extremities warm. Your hand and your feet are generally the first parts to start feeling the cold. Gloves and thick woolen socks help a lot, but boosting your coverage on heat losing areas such as your head and neck will help in keeping you warm everywhere else (pack a beanie!). Finally shoes. Shoes keep your feet dry, warm and protected. Winter often means wet, so waterproof boots make a big difference. Couple whatever shoes you wear with a pair of woolen socks so that even if your feet do get wet, they’ll stay warmer than with alternative socks.

Camp Site Choice

Not every site is going to be ideal. Try and stick as high as you can within a camp site. This will mitigate any flooding issues and from the lowest coldest points. Face your tents/accommodations door downhill – cold air will flow into tents facing uphill.

Tents/Accommodations

Be it a swag, ground tent, roof top tent, camper trailer or hammock minimize the amount of airflow. This means putting up your flys, closing windows and doors. BUT ensure there is still enough air flow that you don’t build up condensation – nothing teaches is more unpleasant than the dripping of condensation on your face in the middle of the night – a small crack is all that it takes to alleviate the problem!

Bedding & Sleeping Arrangements

The final and most essential part of staying warm an enjoying camping in winter is your sleeping arrangements! Quality sleeping gear/bedding is essential. Whether you use a sleeping bag or a doona, make sure it’s warm enough for the conditions. Consider layering again. If you don’t have a single sleeping bag or doona that’s warm enough, use 2-3 and stack them on one another. Don’t forget what you’re sleeping on top of either! A quality mattress that insulates you from the cold makes a world of difference – inflatable air mattresses just won’t cut it! Foam mattresses are best as they ensure there is little air movement beneath you, insulating you from the cold. Air mattresses have huge volumes of air that can move around freely, meaning that it’s incredibly hard to insulate with. If you do plan to use an air mattress, bring a thick underlay to help provide a layer of insulation below yourself. Don’t over-dress – too much clothing in bed will make you either too hot and prone to sweating (leading to cold later), or won’t allow your sleeping bag and other bedding to properly insulate the heat you’re producing. A beanie and socks are must haves, and a thermal top and bottom can make a big difference. Finally go to bed warm! If you’re cold when you get into bed, it’ll take longer to warm up. Before you jump in, warm up by the fire or do some small exercises to maximize your body heat.
Synthetic Rope v Steel Cable on Winches
With electric winches becoming more popular and more and more affordable accessory on the modern 4×4; the choice between using steel cable or synthetic rope on your winch is a question most people need to address. Ironman 4×4 offers four variations of 12v winches to suit most 4×4 applications. The size of the winch is generally matched to your vehicle so the choice between all of these comes down to whether you choose steel cable or synthetic rope.

So why choose synthetic rope over steel cable and vice versa?

Cost

There is a pretty straight forward answer here. If you want a cheaper option then steel cable is the go. But for many the extra investment in synthetic can pay off over the long term – both in usability and the lack of future desire to swap cable types in the future.

Weight

Synthetic rope is a huge weight saving over the equivalent steel cable. Generally you save 10-15kg by going to synthetic rope, which can be a huge saving – both on your front suspension and also on yourself when handling and using the winch.

Durability

Durability is an even match – the synthetic rope is more prone to abrasion, but the steel cable will also suffer if not treated correctly – developing burrs. Sythetic rope wins out with rust resistance, with steel cables if untreated becoming rusty.

Handling

Synthetic rope is much safer and easier to handle. Being lighter it’s much easier to carry around and is much more flexible and malleable, which makes it much more compliant. It also happens to float. Steel cable on the other hand requires gloves to handle as metal filings can get stuck into your skin (not a pleasant experience). It also has built in tension within it as it’s not nearly as malleable as rope – meaning it has a lot more spring to it.

Safety

There is no questioning it, synthetic rope is safer. By design synthetic rope doesn’t store nearly as much potential energy, so if the rope should snap it won’t be nearly as dangerous (a winch damper is still always recommended to use). As stated under handling, synthetic also doesn’t suffer from filings and burrs the same way steel cable does – meaning it’s a lot safer to handle as well.

Overall

Ironman 4x can’t recommend enough taking advantage of all the benefits that synthetic rope provides. The small additional cost at the time of purchasing your winch is greatly offset by the ease of use and safety that is provided by synthetic rope. Ironman 4×4 sells synthetic rope seperately from our winches for those wishing to upgrade. Offering two different sizes based off the size of your winch and their respective ratings: To suit 9500lb winch or near equivelent – 9.5mm synthetic rope To suit 12,000lb winch or near equivelent – 11mm synthetic rope
4×4 Australia & Ironman 4×4 High Country Sneak Peek
4×4 Australia recently joined us for a trip into the Victorian High Country. Check out this sneak peek video of what we got up to – including the spectacular views from Mount Blue Rag.
Foam Cell Pro Testing
Satisfying the expectations of four wheel drivers from around the world requires a dynamic approach to product design. Ironman 4×4 invests considerable time and resources toward the development of all its products, and the new Foam Cell Pro shock absorbers are no exception. Utilizing state of the art equipment such as Motec Data Logging, Roehrig dynomometer, CAD design software and in-house prototyping, the Ironman 4×4 product engineers possess a relentless passion for performance. The Foam Cell Pro shock absorbers are a culmination of 56 years suspension experience and Ironman 4×4 have been producing Foam Cell shock absorbers for 15 of those years. We have a solid understanding of the benefits that Foam Cell technology can provide. Through the evolution of our work within the military and armoured vehicle sector we set about creating the largest, strongest and most robust production shock absorber available. Taking this approach and applying it to everyday vehicles makes perfect sense when you consider the punishment your 4×4`s suspension endures. We set out to investigate shock absorber temperatures and how they affect performance. Beginning with oscillation testing, we mounted a Foam Cell Pro shock absorber to the dyno, the objective of the test is to determine the performance degradation at set temperature intervals, measured using a mounted infared thermoprobe.

Stage 1 – Cold

A “cold” benchmark temperature. (45 degrees centigrade)

Stage 2 – 70 degrees centigrade

Stage 3 – 100 degrees centigrade

Stage 4 – 130 degrees centigrade

Stage 5 – 150 degrees centigrade

At 150 degrees the paint coating on the shocks body was becoming tactile. Small amounts of fade are beginning to be evident in the graph – to a point where it would be noticeable when driving. Taking the shock to 200 degrees is the point where some components of the shock will suffer accelerated wear and will be destructive over time. The risk of seal failures become heightened and for this reason ceased the testing at 150 degrees.

Dyno Conclusion

As shown in the dyno results, there isn’t any noticeable decrease in shock performance until they reach 130-150C. This provides a basis for real world testing – as unless the shocks are reaching 150C or more in the real world applications, there shouldn’t be any noticeable fade. Our second test involved comparing the rate of temperature increase by recording the length of time a shock absorber would reach a set temperature. As a basis for comparison we took an original (OEM) shock absorber together with Ironman`s Nitro Gas, Foam Cell and Foam Cell Pro shock absorbers. Oscillating the shock absorber at a rate comparable to high speed corrugations (0.6m/s) we further amplified the effect by not cooling the body surface with any passing airflow. The speed taken for the foot valve surface temperature to increase from 30 degrees C to 120 degrees C.

Shock Dyno Results

Model  Start Temp   Warmup End Temp   Time Elapsed   Percentage Improvement
Hydraulic OEM 30*C 120*C 5:40 Benchmark
Nitrogen Gas 12636GRC 30*C 120*C 12:18 217%
Foam Cell 24636FEC 30*C 120*C 16:48 296%
Foam Cell Pro 45636FEC 30*C 120*C 19:02 336%
  The results of this test show that the higher oil volumes of the larger bodied shock absorbers increased the length of time taken for the shock absorber to reach maximum temperature. The oil volume of a typical Ironman Nitro Gas shock absorber from the rear of a Nissan Navara contains 320ml of fluid, the Foam Cell equivalent contains 450ml, and the Foam Cell Pro a whopping 750ml.
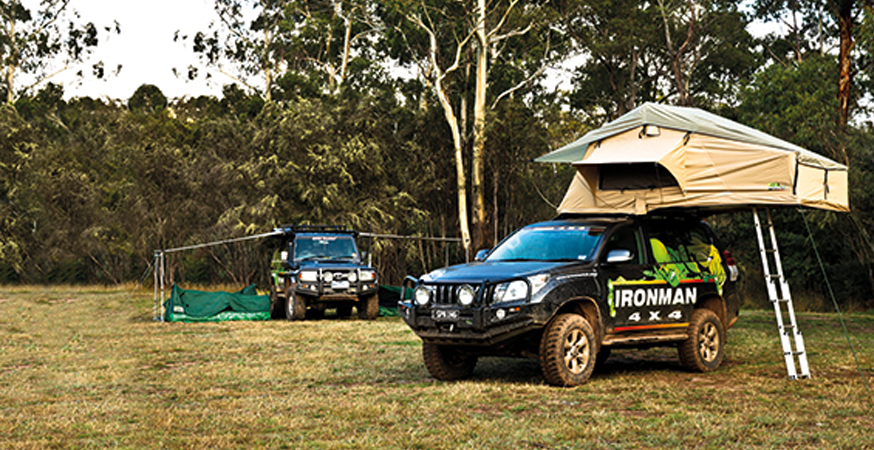
Real World Testing

Thousands of kilometers were put on the Foam Cell Pros during the initial development phase, but a more extreme environment was required for extended testing – local tracks weren’t going to cut it.

To properly test the shocks, they needed to be taken over the tracks that would work them as hard as possible and across a variety of different terrains. The Oodnadatta track (from Coober Pedy), up to the Finke race track (via Mt Dare) and then through the Simpson Desert and the Birdsville development road were selected.

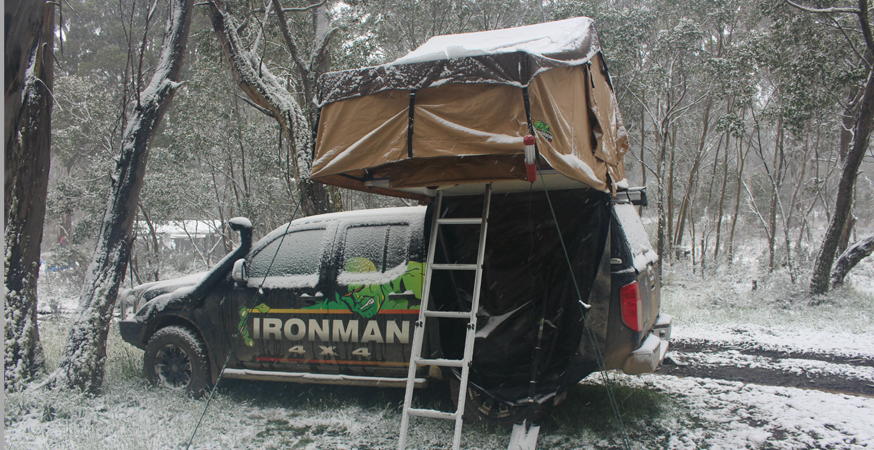
Throughout the period of this testing, the ambient temperatures in the Simpson were 44 degrees C, with ground temperatures regularly sitting around 60 degrees C – trying conditions for both the vehicle and our staff. The vehicles taken were:
  • Nissan GU Patrol (Foam Cell)
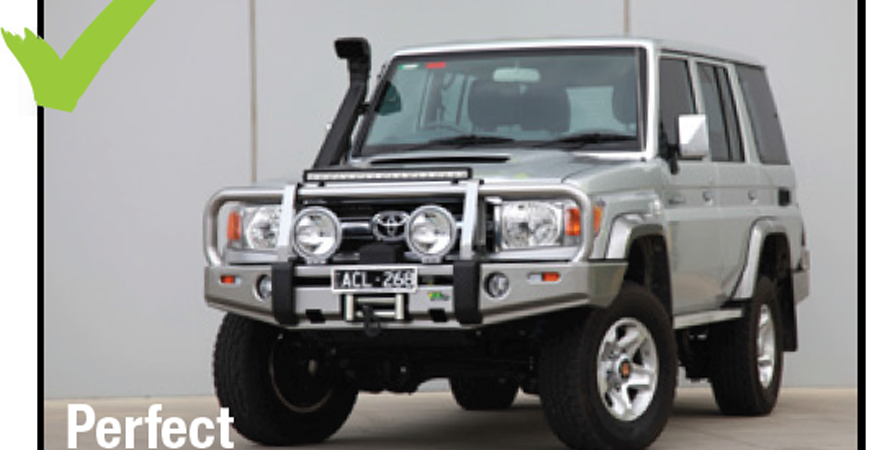
  • Toyota Landcruiser 79 Series Dual Cab (Foam Cell Pro)
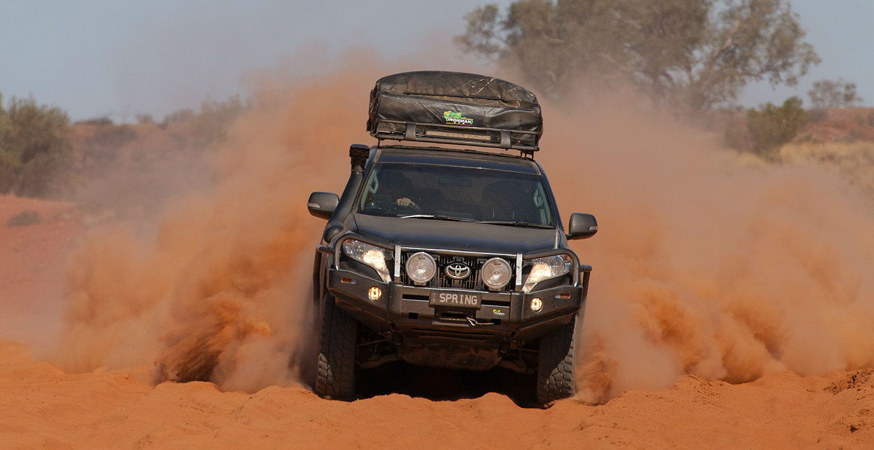
  • Toyota Prado 150 (Foam Cell Pro)
  • Nissan Navara D40 (Foam Cell Pro)
  • Toyota Hilux 2011+ (Foam Cell)
These vehicles were chosen to give a cross section of some of the most popular vehicles on the market and provided some direct comparisons between different suspension setups. Coober Pedy to Oodnadatta Leaving Coober Pedy we hit the first of the gravel roads and fine corrugations. There was lots of high speed driving (110km/h) along this gravel road and the outer bodies of the shocks took plenty of rock blasts – stripping paint from the body of the shock and the axles of the vehicles – however the performance characteristics of the shocks weren’t challenged by these roads. Tracks around Mt Dare, past Hamilton Station, Eringa Station and Bloods CreekThe tracks around these areas were more demanding, they were still high speed, but with larger corrugations, deep floodways and large rocks both embedded and loose. There was enough undulation in these roads to get a vehicle airborne and force reduced speeds over rougher sections. We measured the elevated shock body temperatures at various stages through here – with the temperatures averaging 70-85 degrees C depending on the vehicle. We noted that the higher speed sections resulted in lower shock body temperatures – likely due to the increased airflow under the vehicle and around the shock bodies. Finke Race Course The race course sections involved slower speeds of 30-40km/h, but induced full stroke oscillations from the suspension. Thanks to the heavily undulating profile the race buggies chop into the earth, any speed beyond 45-50km/h would result in the vehicle leaving the surface in an uncontrollable rhythmic jounce. We’d expect that no vehicle in road trim would be capable of sustaining much higher speeds – only long travel competition style suspension would have the ability to isolate the body movements over this terrain. Over our testing on this section, the standard Ironman 4×4 Foam Cell shocks in the front of the Nissan Patrol reached 114C at the foot valve, whilst the same shock absorber (Foam Cell Pro design) in the Toyota 79 Series Dual Cab was only 95 degrees C by comparison – an almost 20 degree C difference. Mt Dare to Purnie Bore The track between Mt Dare and Purnie Bore was heavily corrugated, very rocky and rough, enough to snap 2 UHF aerials fitted to our vehicles. All vehicles again sustained heavy rock damage to the rear axle and shock bodies, the 3mm external wall thickness of the Foam Cell Pro shock absorbers withstood the larger impacts where the thinner walled bodies dented heavily. Shock body temperatures were consistently between 80-100 degrees C across the range of vehicles and shocks. The French Line (Simpson Desert) Within the sandier sections on the French Line, we came across a new variety of terrain that only a remote location like this could provide. Crossing the Simpson Desert involves traversing 1100 sand dunes, however these aren’t the main challenge for the suspension – instead it’s the hundreds of smaller ruts, and tramping mounds formed in the sand between each dune that really tests the vehicles and their suspension. These “tramping mounds” consist of largely spaced corrugations often 20-40cm from peak to trough generated by prior travellers in the soft sand. The best approach to this terrain is to travel at a speed high enough to skim over the tops of the bumps but still slow enough to avoid larger ruts and holes. More often than not, a slower speed is required, which is by far the most demanding on vehicles. The mix of slow undulations, tramping corrugations and full suspension stroke over these sections was the most variably taxing of all the terrains and is where we succeeded in generating our highest recorded temperatures of 104 degrees C in the Foam Cell Pro and 119 degrees C in the regular Foam Cells. Here it was the Prado 150 with the Foam Cell Pros and the Hilux with the equivalent strut in a standard Foam Cell that hit these max temperatures.

Real World Testing Conclusion

You`d be hard pressed to find road conditions tougher than those in the Simpson Desert not to mention the 40+ degree C ambient temperatures. Having worked the vehicles and their suspension to their limits in taxing conditions, at no point did the Foam Cells or Foam Cell Pros approach the 150 degree C temperature found to be the turning point for shock fade. None of the vehicles had any noticeable decrease in performance or shock fade, a great testament to Foam Cell shock absorbers.
Tyre Pressures – Why they are so important
Tyres are often one of the first mods anyone with a 4×4 will do. Offroad tyres will provide better grip in trying conditions and are often larger in diameter to improve clearance. But the thing not as regularly talked about is managing these tyres when on the vehicle. Every tyre manufacturer will have their own stated ideal pressure for a tyre on different vehicles which will account for the weight of the vehicle. Managing these tyre pressures on road will ensure that you maximise your tyres life. But often these manufacturers and retailers won’t make mention of what pressures you should be running offroad – and often this is because it’s something the user needs to decide on, based off conditions. Dropping your tyre pressure is a simple affair and using something like the Ironman 4×4 Speedy Deflator will get you down to the right pressures quickly. General 4WD Tracks: As soon as you hit the tracks it’s always a good idea to drop your tyre pressures from you usual road pressure. Road pressures are matched to driving on the blacktop which is smooth, but tracks, be they gravel, dirt etc, aren’t generally as smooth or consistent. Dropping your tyre pressures will allow the tyre to more easily conform to the inconsistencies of the track – providing a more comfortable ride, more grip and most notably better tyre wear as you’ll have less chipping and cutting in the tred blocks as the rubber is able to conform. Pressures of around 25psi are generally a good point to start at, though this will vary depending on vehicle. At this pressure it’s still safe to do some high speed driving, but will allow the tyres to conform to the road providing a smoother, more comfortable ride and better grip. Sand Driving: Ideal tyre pressures in sand can vary quite significantly depending on the softness and water content. Wet sand is denser and better supports vehicles, but if you do dig in, you’ll stick harder due to suction. Softer sand will dig more easily, hampering momentum, but is relatively easy to recover from. As a rule of thumb anywhere from 15psi – 20psi is always a good place to start. If you find you’re still struggling at these pressures, drop down 2-3psi at a time until you come to a point where you are able to “float” over the sand rather than “dig”. Don’t go much lower than 10psi except for emergencies as any lower and you are at high risk or rolling the tyre off the rim and also damaging your rim. Mud:  Similar to wet sand, drop down to 15-20psi if you’re having issues at higher pressures of 25psi and try and maximise your potential grip. If you have skinny mud tyres you may also run a higher pressure (mid 20s) to “cut” through the mud and reach the harder surfaces at the bottom (if there is any!). Most importantly when you’re back on the road, pump up your tyre pressures again ASAP! Not only is it not nearly as safe to drive with low tyre pressures on road, it will cause pre-mature wear of your tyres. A portable air compressor will get you back up to road pressure in no time, and saves the slow drive to the nearest servo!
Basics for the
Beach
With the last of the good weather soon coming to an end, there is no better time to take advantage of the last of it down on the beach! 4WDing on the beach comes with it’s own challenges, but is also very forgiving for your vehicle choice. You don’t need a fully kitted out vehicle to have a nice play on the sand! BUT as with anything, there are a few items that make it all much easier and safer to enjoy – there is nothing worse than getting stuck with a rising tide.

Tyre Pressures

Tyre pressures are key to an enjoyable day on sand. Lowering tyre pressures increases your footprint and distributes the weight of the vehicle over a greater surface area – allowing the vehicle to “float” across the top rather than digging in and sinking. Lower tyre pressures will also assist in creating a smoother ride over what can often be quite uneven surface – and everyone enjoys a good bit of comfort! Tyre pressures are an easy thing to adjust. A key in your valve will do the job, but it’s a laborious affair and without much precision as to what pressures you’re running. The Ironman 4×4 Speedy Tyre Deflator is an easy way to quickly and accurately drop your tyre pressures to match conditions (usually between 15-25psi – though don’t be affraid to go lower if you need to!). Raising tyre pressure when you get back on the road is at the other end is another point to consider. You can make the slow run to the nearest servo, but there aren’t always conveniently located, so rather than causing undue wear on your tyres, think about investing in a portable air compressor. Finally there is nothing worse than getting a flat and needing to change the tyre on the soft sand. A tyre repair kit can assist with getting you out of trouble long enough to find a tyre store who can assist with repairing or replacing your tyre.

Basic Recovery Gear

When driving along beaches, you should always be aware of the tide and also ideally never drive alone. It only takes a minute to bog in and leave you with hours long recoveries – especially if you are on your own. A basic recovery kit with some rated shackles, an appropriate snatch strap and some appropriate recovery points can mean a quick tug out, or a lot of digging! But digging can be an inevitability if you aren’t careful and a shovel can definitely help the process along if you do have the misfortune of getting a little stuck! If you do happen to venture solo though. Self recovery becomes far more important. So on top of the shovel, some traction boards such as our Total Traction are a great option to allow you to drive out of bogs and get sufficient momentum to extract yourself! Finally! The most important thing is to get out there and have a great time!
*April Fools* NEW PRODUCT RELEASE: Ironman 4×4 Mind Controlled Winch Remote
During an intense recovery you need all hands on deck! So Ironman 4×4 have come up with a solution to assist with controlling your winch, without having to hold your controller – our new mind controlled head unit! Prices and availability on inquiry! Contact: aprilfools@ironman4x4.com
4×4 Earth National Forum Meetup
The 4×4 Earth National Forum Meetup was yet again another great success. This year there was over 200 people who attended the event and dozens of vehicles. The event was a great opportunity for the online community to meet up and put faces to those names that many are in regular contact with online! With members of 4×4 Earth driving down to O’Tooles Campground, VIC, from all across Australia, with members from as far as Queensland coming down for a week of fun 4x4ing, camping and socialising! Ironman 4×4 was there over the weekend getting involved, enjoying a fun run around on Saturday with a crew that included some steep climbs and a couple fun river crossings – not to mention the great lunch at the Wally pub! As part of the meetup 4×4 Earth also ran a raffle to raise money for local causes. This was a great success with more being raised this year than any previous year!